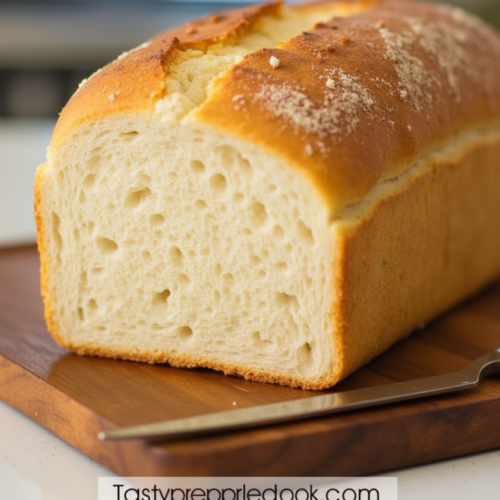
Nothing beats the aroma of freshly baked bread wafting through your kitchen. Imagine slicing into a crusty, golden-brown loaf with a soft, airy interior, all without the hassle of kneading. No-knead artisan bread has taken the baking world by storm, offering a foolproof way to make bakery-quality bread at home with minimal effort. This guide will walk you through everything you need to know to master this simple yet impressive bread.
Why Choose No-Knead Bread?
Traditional bread-making often involves labor-intensive kneading to develop gluten, which gives bread its structure. No-knead bread relies on a slow fermentation process to achieve the same effect, allowing time to do the work for you. This method is perfect for beginners and busy bakers who want high-quality results without hours of hand-mixing and kneading.
What You’ll Need
No-Knead Artisan Bread: Bakery-Style at Home
Ingredients
- 3 ½ cups 440g all-purpose or bread flour
- 1 ½ teaspoons salt
- ¼ teaspoon instant yeast
- 1 ½ cups 360ml lukewarm water
- A Dutch oven or heavy-lidded pot
Instructions
- Mixing the Dough
- In a large mixing bowl, combine the flour, salt, and yeast. Stir in the lukewarm water until a shaggy dough forms. There’s no need to overwork it—just mix until everything is incorporated.
- The Long Rise
- Cover the bowl with plastic wrap or a clean kitchen towel and let it sit at room temperature for 12-18 hours. This slow fermentation allows the yeast to develop flavor and structure. The dough should be bubbly and doubled in size when ready.
- Shaping the Dough
- Lightly flour a clean surface and gently turn the dough out onto it. With floured hands, shape it into a rough ball by folding the edges toward the center. Be careful not to deflate the air bubbles that have formed.
- Second Rise
- Place the dough on a sheet of parchment paper and cover it with a towel. Let it rest for another 30-60 minutes while preheating your oven to 450°F (230°C). Place the Dutch oven inside as it heats to ensure it’s hot when the dough goes in.
- Baking the Bread
- Carefully transfer the dough (using the parchment paper) into the preheated Dutch oven. Cover with the lid and bake for 30 minutes. Then, remove the lid and bake for another 10-15 minutes to develop a deep golden crust.
- Cooling and Enjoying
- Remove the bread from the oven and let it cool on a wire rack for at least 30 minutes before slicing. This allows the interior to set properly, ensuring a perfect texture.
Notes
Conclusion
Making bakery-style artisan bread at home has never been easier. With just a few basic ingredients and some patience, you can enjoy a beautifully crusty loaf without kneading. Whether you’re a beginner or an experienced baker, this no-knead method is sure to become a favorite in your kitchen. Happy baking!